Showing posts with label homesteading. Show all posts

Thursday, August 25, 2016

Sorry Ducks

Summer time is filled with lots of activity and work, that is for sure.  I think the busyness of all the to-dos help me cope with the coming of fall (less gardening, food preserving, yard work, etc).  Though apple butter season will be approaching soon, Eek!!

We recently put another homesteading tool in our belt; that tool being the experience of killing and cleaning our own ducks.  In poor meat fowl raising fashion, I lost track of how old the ducks were and we didn't know their live weight.  I suppose if the ducks were self consciousness about their weight and age like us silly humans at least they 'went out' with no complexes.
https://www.threadless.com/designs/duck-face-4

Any who, we heard from different people that cleaning ducks was a tedious task with the amount and type of feathers.  This we now understand.  From our homesteading books we read that you attempt to kill them during their second molt, which reduces some of the plucking.  We think we got them before their full second molt but had to schedule the killing instead to coordinate with summer travel plans.  After killing them we realized based on their dressed weight they should have been larger.  But I digress.
(Dressed weight typically means the weight after the animal is killed and internal organs and less desirable portions of the animal removed.  Not this-)

Moving on....

PLEASE NOTE: I refrained from showing graphic pictures for those that are sensitive to such.  The most graphic picture is Jonathan holding a headless duck, no blood is visible.  Just want to point that out but encourage everyone to look at the process.

(Up until kill day, kid stalking was probably the most stressful thing our ducks encountered)-

Fact: If you eat animals death is involved.  I think that is important to embrace for the sake of perspective and respect.  I personally feel as a Christian that we are to be good care takers of God's creation and not just say 'ignorance is bliss' in regards to animal processing.  I don't think animals are here for our careless expenditure (careless being key word).  I know I am opening up a can of worms here, maybe more on this another time.  The fact is lots of animals die daily to keep up with our country's food demands.  Just a quick Google search told me that roughly 21 million chickens are EATEN DAILY in the US alone.  Whoa nelly!  A lot of deaths.

I like knowing that our animals have one bad day in their lives; kill day.  The same can be true for large livestock operations as well, but I believe it is not always the case.  I also like that our killing is instant.  We chop the head off in one quick blow with an axe.  In large poultry operations birds are hung upside down, stunned (I think usually electrically) to remove feeling, then their throats are cut to bleed out.  This process has a reason to it and I understand that.  There are also laws (or guidelines, not clear on this yet) to ensure the process is quick and not drawn out to make it as humane as possible.  I am sharing this information for comparison and again for perspective sake.

Here is a link that I found helpful if you want to know more about poultry processing.

Onto our duck processing.

Step 1 Killing the animal.  We did this by me holding the duck in my hands (and I actually got sad and considered not killing it at this point), Jonathan laying its head on a tree stump with one hand and cutting the head off with ONE swift blow with his axe.  There was little to no struggle.  At this point the animal bleeds out.


Step 2 We dipped the duck in boiling water to help with the plucking process.  For the most part feathers came out easily and quickly (we followed water temperature and scalding time recommendations) but the pin feathers were a beast to remove.

-Plucked and wing ends removed.

Step 3  Next you need to remove all the innards.  You do this by cutting around the duck's anus using great care to not nick the digestive tract (which could release feces and get on the meat which is not ideal).  Once you cut that part free from the body then the innards can start being pulled out.  Once the duck is completely cleaned out we did another rinse inside and outside for good cleanliness practice.
No picture for this step, our hands were really dirty and we wanted to move them as quickly as possible to be chilled.

Step 4 Now the carcasses have to chill to an internal temperature of 40F.  Chillin'-

Step 5  Once chilled we vacuum sealed them and put them in the freezer.  Done.

Step 6 Cook and eat them, which is going to happen tonight.

Duck fat is a healthy fat (in my pro fat opinion) and duck meat is rich in flavor.  Some people describe it as tasting like all dark and very juicy meat.

That is all I can write for now; sorry to end so abruptly, motherhood is calling. :)


Thursday, October 15, 2015

First Annual Apple Butter Day

We did it, we successfully made apple butter the old fashioned way.  Many came, many helped and for that we are soooooo thankful.

A brief note about what apple butter is:
Apple butter is a highly concentrated form of apple sauce (though I hate to put the two in the same sentence).  It is cooked on low (traditionally over a fire) for a very long period of time so that the sugars actually caramelize.  Apple butter was traditionally made to use up the overabundance of apples.  It also preserves longer than apple sauce due to the higher concentration of sugar.  One common confusion is that it does NOT contain any dairy.  I assume the name comes from the consistency because you cook and stir the apples for so long that it becomes thick and almost creamy like butter.  It is different from apple sauce in that it is MUCH more thick and richer in flavor.  Think rich apple jam.  Another important aspect of making traditional apple butter is the community labor.  Due to the length of time of stirring many people share the work, and enjoy the time together while working.
Note that you CAN make apple butter in a crockpot and it is quite delicious.  So far though, the consensus around our house is that the old fashioned way made a much yummier product (good thing).

The rewards-

Starting with 3 bushels of apples.  I used 2 bushels Cortland and 1 bushel Honeycrisp.  The night before we had an apple peeling and coring party.  There was 6 of us and it only took a couple hours.

We started by adding 2 gallons of apple cider and reduced it by half; then we started adding apples in stages as they cooked down.  Beginning stages-

Lots of stirrers on hand and most everyone had a smile on their face while taking their turn-


Time for a thickness test-


Once no water is seeping out of the butter then you start adding sugar and spices-

It should be thick enough to stick to a plate upside down.

Determined-

Beginning canning-

Scraping the pot with biscuits is a treat for the end, and helps clean the pot.


In the end we yielded only 46 pints.  I was anticipating more but it depends on the kind of apples, the amount of water, etc.

Here is the recipe I followed-

  • 2 gallons real apple cider
  • 3 bushels apples (1 bushel = 40lbs apples), any ok cooking apple will do
  • Sugar (I used 16 lbs white, 2 lbs brown.  Add to taste depending on your apples)
  • 1/2 cup cinnamon, or to taste
  • 2 ozs cloves, or to taste
We ended up not getting 1/2 bushel of apples into the butter due to concern of time.  So the 2.5 bushels yielded 5.75 gallons or 46 pints of apple butter as I said above.  The recipe estimated yielding 12 gallons butter, so as you can see different apples cook down differently.

Time and stirring
We started the cider around 8am and started adding apples around 9am.  We began canning around 5:30 pm, I think.  So thats 8.5 hours of cooking/stirring.  You MUST stir constantly as I have been warned it will ruin the whole pot if any hot spots are formed since the apples will stick and burn.

Last, cleaning the pot.  We used an antique brass kettle and wanted to make sure we cleaned it properly. (Note that when cooking with apples be sure to use a non reactive pot).  First, wash out excess sauce with soap and warm water.  Second, scour the pot with warm ashes (this really worked well).  Third, wash the pot with soap and warm water again and rinse clean.  Dry it completely.  Oil the paddle and store everything in anticipation of doing again next year.

Conclusion, the work was most definitely worth it.  Now eat the apple butter on warm buttery toast with a side of bacon.... for dinner.... like we did last night.

P.S. there are many other uses for apple butter in recipes, look them up. :)


Thursday, September 10, 2015

30 Minutes Or Less Food Preservation

For some reason typing this title made me imagine myself having my own cooking show, which instantly brought on this next image of what it would probably look like-


Sooooo, while my mind is in full disclosure mode let me add that I feel somewhat silly writing this post.  You see, though I encourage people 100% to try and grow and preserve their own food, this year I did very little of it.  We did grow a garden this year and reaped some rewarding food, but crab grass was our main speciality.  So if anyone has any good crab grass recipes please share it (or don't).

So here is my quick list of EASY THINGS TO GROW and then PRESERVE in LESS THAN or around 30 MINUTES.  

(Please note that I do not live in a vacuum by any means, I try to do this stuff when kids are taking quiet time, watching a show or in bed.  Otherwise add 4 hours to the processing time.)

------------------------------------------------------------------------

1.  Tomatoes


Tomatoes are pretty easy and can be grown in a container on a back porch if needed.  Remember that if in a pot that it will usually need more water.  As you know there are many varieties to choose from, we like to grow sweet, meaty varieties because you get more 'meat' and less water.  We have had good success with Amish Paste, San Marzano (both 'plum' varieties) and Brandywines.  There are SO MANY other meaty varieties though so ask around what grows well in you area or just buy them from a road side stand.

Preserving
I am NOT a huge fan of eating fresh tomatoes, I AM a fan of having them around in the winter for soups or stews.  Making sauce and pressure canning them takes more time than 30 minutes BUT they freeze beautifully.  Just wash and dry them, make sure no rotten spots, pull off stem and put them in a freezer bag.  That is all.  No blanching, skinning required.  I'M SERIOUS.  Here's the cool thing, when you want to use 1 or 10, pull them from the freezer and let thaw only a little.  I actually just run them under warm water to thaw a little.  Once slightly thawed the skin will slip easily off.  So easy.  I will cut the whitish, firm stem area out and then maybe quarter before I add to a soup or stew recipe.  They will break down and mash up just like canned tomatoes.  If they are still slightly frozen they are easy to cut and won't squish.  So why buy canned, stewed tomatoes again?  I make our own tomato soup with frozen whole tomatoes, better than Campbells and VERY quick.  Recipe Here.  Also note that once fully thawed they are very squishy so don't expect them to be very good on a sandwich.


2.  Pickles


Cucumbers are easy to grow and can be grown in small spaces up trellises (they love to climb and look lovely too).  For pickles you need to grow a pickling cucumber variety, but let me say that I think pickling cucumbers taste better than regular cucumbers freshly sliced.... but that is just me.  They are popular with my neighbors for sure.  They are also very abundant so you get a lot.  Cucumbers are one of my favorite vegetables for many reasons.

Preserving
Pickling can be quick depending on the recipe.  In short, most dill or sour pickles (which is what we usually do) involves making a brine, cooling it and adding brine/spices/cucs to the jar.  Done.  Give it time to actually pickle in the jar but you don't do anything in that regard.  We keep these in the frig since I do not seal them through a canning process.  Plus, cold pickles are tastier in our opinion.  Another pickle post Here.

3. Fresh Herbs
http://moorefarmsbg.org/wp-content/uploads/2015/05/herbs.jpg
Some herbs are so easy to grow they are a nuisance, meaning they will take over the area they are in. Talk about a huge difference fresh herbs make in recipes, HUGE.  Comparing dried herbs to fresh herbs in taste is like comparing sleeping on wet concrete to sleeping on an amazing mattress.  Maybe a slight exaggeration.... slight.

Preserving
I put the fresh herb leaves whole in my food processor.  I turn the processor on and start adding oil slowly.  Just enough to chop them and stick to the sides of the processor.  A little more oil is ok too.  I then put the 'paste' in an ice cube tray and cover with plastic wrap (I fill basil to the top of each cube, stronger herbs tasting herbs maybe only half cube).  Let freeze solid them put the cubes in a freezer bag.  Label the bag because they all look like green squares.  I use them in soups and even pasta dishes.  I just throw the frozen cube right into the hot soup at the end or hot pasta.  I make and freeze basil pesto this way too and love having summery pesto dishes in the middle of winter.
Note: I have not experimented with freezing all fresh herbs, I assume most leafy herbs do well but if you know otherwise please share the knowledge.

4.  Edamame (Or Soybeans)
http://www.withamymac.com/news/wp-content/uploads/2010/10/edamame.jpg
We grew Edamame a few years ago and loved how easy it was and how great it turned out.  We had eaten edamame at some Japanese or other Asian inspired restaurants and alway like it.  The kids like it ALOT too.  We think they like the saltiness of them (we add sea salt).  And it's good for you!
This is the kind we grew linked HERE, we love Botanical Interests seeds.


Preserving
Just blanche, ice bath and freeze in a freezer bag.  I freeze them on a cookie sheet so they don't stick together then put them in a bag once frozen.  That way you can take out a little at a time as you want a snack.  Just defrost or warm them up, don't cook them again.  Did I mention these were really good, just add sea salt.


5.  Potatoes

This is a picture of my parents potatoes and onions, happily stored in their garage.  Potatoes are pretty easy to grow.  You just need well worked up soil and seed potatoes.  They don't take up anymore space than a bush bean plant.  Some people have grown them in straw towers (aka potato towers) or bags of soil (aka dirt bags, aka the media and their.... I will stop there).

Preserving
You just put them in a paper bag in a cool, dry place.  We put ours in our basement.  You don't even have to clean the dirt off.  Done.  Just wash off before you cook.
Sweet potatoes and a dirty boy from a few years ago.  Sweet potatoes are vines and take up more space but easy to grow.

Other things that are a quick blanche and freeze worthy:  green beans, asparagus and corn.  Also easy to freeze and come out great:  BERRIES!!  We love having our picked blueberries in yogurt most of the year.  Berry cobbler in the middle of the winter anyone. :)

Please share if you have any food preserving tips!!!


Wednesday, May 20, 2015

Eat More Weeds

I have reached Level 5 of Domesticism.  I can't quite place a symbol figure for this level but Level 8 would be Ruby, from the book/movie Cold Mountain:

Level 9 would be Christy.


And Level 10 would be Caroline Ingalls (from Little House On The Prairie):

But I figure if I were to reach these upper levels I would have to be without electricity or internet so you would not hear of my rise in skill sets.  So if I drop off the grid you can secretly cheer for me and  and think of me hunting out road kill and eating dandelions.

So back to eating weeds.  I truly am promoting it (only if you properly educate yourself first, oh and promoting only the legal ones too).
This past Christmas Jonathan fueled my strange hobby endeavor by getting me this book:

I have found herbology to be pretty interesting.  No, I don't wear tie dye and ankle skirts (though there is nothing wrong with that), but I like history and I like plants... and I like self sufficiency so herbology is a good study for me.
Don't worry, I am not turning on modern medicine.  And I am not making any crazy and possibly dangerous tinctures, I don't plan to go that far.  But I did pick some wild violets in our yard this spring and seeped them in oil to make a soothing skin oil.  If you think that is weird then look at the ingredients in your lotion, does it contain aloe, then you rubbed the guts of a plant on your skin too.


Other medicinal herbs/plants/weeds you are probably consuming include rosemary (digestion, circulation), thyme (antiseptic, good to treats colds), garlic (digestion, circulation and more), oregano (antioxidant, antiseptic) and oats (soothing).... just to name a common few.  Herb's medicinal compounds are extracted and used everywhere.  One for example is thymol, a compound extracted from common thyme, is used in mouthwashes such as Listerine (source).  I could also say something about mint, licorice and marshmallow, all once sweetened and used medicinally.... now just an artificial flavor added to corn syrup for a candy.

So back to weeds, these are medicinal plants I discovered growing in our yard:

(All the medicinal notes are summarized from Making Plant Medicine book, as mentioned above, by Richo Cech.  I am NOT a doctor nor do I claim to be, so therefore don't take my word for these things.  I encourage you to research this stuff on your own if interested in personal use.)

Cleavers:
These guys were found growing near our water facet, guess they are moochers of the drippage.
Cleansing of the lymphatic and urinary tract system and blood.  A strong diuretic used helping with urinary tract problems (such as kidney stones).  I picked some, dried it (on an awesome homemade Christmas present from my sister-in-law) and made my husband drink it in some tea.  He lived.... and had to pee a lot, so I guess it worked.

Drying

Lady's Mantle:
This lovely flowering plant was already planted in a flower bed next to the old koi pond.
Appropriately named, good for general women's health.  Books says helpful in toning reproduction organs, good pregnancy tonic, postpartum relief, mood swings and other womanly problems (cause y'all know we gots the problems) .  Apparently a popular tea still for women in other countries.


Echinacea:
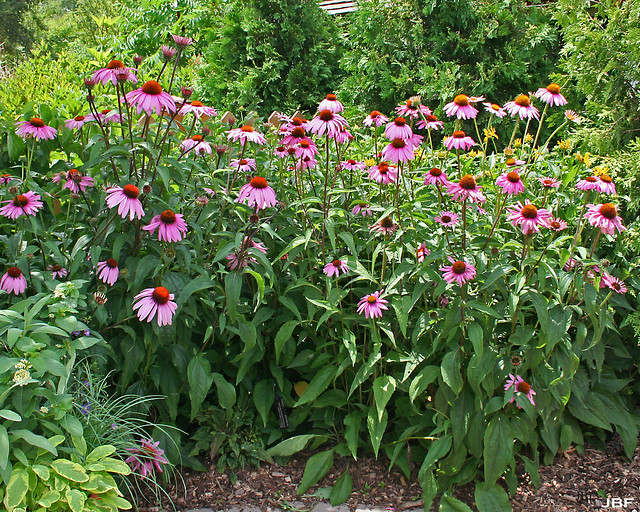
An immune stimulant that increases overall disease resistant.  This tea actually taste pretty good (I buy the tea instead of making it myself).


Violets:
We have violets growing all though out our yard.  I know its not lush grass but it gives a nice color in the spring.
Cooling and healing, for either internal or external issues; upper repository infections to skin problems.  This is what I made my skin oil from, as mentioned above.


Stinging Nettle:
This guy hangs out in our asparagus patch.  
Nettle is a nutritive tonic, apparently high in chlorophyll, potassium and calcium.  The fresh herb can be used for making beer.


Chick Weed:
This guy pops up everywhere there isn't grass I feel like.
Increases energy levels and fat metabolism.  An excellent hen feed, increasing eggs size and production and even the nutritional value of the egg.  Guess thats the reason it takes over flower beds and gardens even when thought it was properly weeded the season before.... because it needs to pulled up and eaten by a human or a hen.


Burdock:
This big ugly monster is not welcome in our yard, but he is persistent.  The spiny burrs freak little lady out every time she discovers them attached to her, thinking its a spider.  So on top of medicinal properties it is helping her over come some fears.
Used in treating staph infections, impetigo and other ulcerations.  Combined with dandelion or yellow dock could be used to treat psoriasis, eczema, oily skin, boils and gout.
Plant in spring
Burs later in season
That is all I discovered for now.  To answer your question, no, I am not out grazing on all fours on the weeds throughout our yard.  And don't worry the kids and I don't try anything without testing it on Jonathan first.  So far he is doing fine. ;)


Monday, May 11, 2015

Is It Officially Spring!?

"I declare that spring has finally sprung!"


And man oh man we are off and running.... maybe a little too fast.

Surprisingly, we got the garden turned over probably earlier than we EVER have.  I haven't checked any stats but I think this has been a dryer spring than normal, hope that trend does NOT continue into summer.  Nevertheless, it is always exciting to get the initial dirt turned over... to let it sit while the weeds rot for the final tilling.  Good husband-


We did plant plenty cool weather plants and hope to be enjoying some of those in the coming weeks:  beets, carrots, radishes, leaf lettuce, collards, leeks, cilantro, red spinach and sugar snap peas.  I also got some red seed potatoes in.
We have been enjoying our asparagus harvest, it's our new kickoff to the season food along with the well established chive bed.  So tender when fresh, and SO easy to prepare.  And SO tempting to grab-


"Read my face, dirt playing season is here"-


Speaking of those chives and what we like them with, we replenished our egg laying operation with four three new RI Red, Delaware cross pullets (one is no longer with us and the investigation goes on to pin point the intruder).  Signs still seem to point to a feral cat.


We also, for the first time, are raising chicks-


In just a few weeks, they have dropped their chicky fuzz and are growing feathers.  We think they are around 5 weeks old.  They should start laying around 18 weeks old.


Typically we buy pullets around 17 weeks old, so our "investment" of $10/pullet starts laying almost as soon as we buy them (a return).  No special equipment is needed at this age either.  We chose to get chicks this year because I have always wanted different varieties, specifically Plymouth Barred Rock Hens.  The other chick varieties we got are New Hampshire Reds and Golden Salmon Maran (we think, or maybe Welsummer).  Hopefully one day we will have the set up to sell eggs to friends.

Last but not least, we also got our piglets for the year!

Three gilts (young females), Landracer and Hampshire crosses.  This is different from our previous year breed- Yorkshire, Hampshire cross.  These girls have much more length in the loins and those cute floppy ears.  Goodness though, they are HUGE for being only 9 weeks.  Our farmer never disappoints us with his stock-


Picture taken by little man-


So like I said, we are up and running, ready for another attempt to grow some of our own food.  I am really behind on sharing what's going on around here, guess I better stop sitting around.