Showing posts with label basement. Show all posts

Friday, March 27, 2015

Dining Room Blinds Version 4.OhMyHead

One kid ago I set out to make dining room curtains.  I was motivated to make them myself instead of buy them because:
  • I could choose whatever fabric I wanted
  • I could choose the style curtain/blind I wanted
  • I thought it might save some money (fabric coupons go a long way)
  • I don't remember the other thoughts because when I started it was awhile ago
Initial post beginning this ridiculous and unnecessary curtain journey:  Ladies and Gentlemen A Curtain


Here are the curtain versions if interested in:

1.0
Lesson learned- this tie up curtain was cute but wanted something I could raise and lower in seconds.  It was lowered every evening to keep sun out of eyes while at the dinner table.  Plus the fabric needed some help not looking bunched and messy when quickly tied up (probably my somewhat heavy fabric choice to blame).  Would maybe be better in a room where it did not need to be raised and lowered so much.  I also decided I wanted cleaner looking lines.


2.0
Lesson learned- you can't just put loops and strings on the back of any fabric square and it will look good when raised and lowered.  This design when raised would just bunch up into a mess at the top.  I had to create the folds by hand to make it look somewhat normal when in the raised position.  Again, not what I wanted in a curtain I was raising and lowering daily.


3.0
Don't have a picture because it was ugly.

4.0
The current shade (roman shade).  Still not perfect when quickly raised.  Fabric still will  fold backwards when raised (instead of forward creating the nice over lap folds in the front).  I am happy enough.... for now.  


Just for reference this is what the back looks like.  Tube tape, dowels to keep things from bunching and string threaded through.  If it worked great I would share more tips, but I am still in need of some tips myself.  Like I said, for now it is good enough.

Overall lessons learned- lots learned.... so I consider the overall process a gain for the brain, but was not the way I preferred to spend my 'free' time.

Saturday progress on the basement, ceiling is up.  Thankful for friends help.

This weekend hubby and I plan to put up some walls.  Don't worry, not figuratively speaking.

More details in another post on the over all construction/progress of this basement that used to flood every rain storm.


Wednesday, January 21, 2015

Some Beginning Notes for 2015

Please excuse the continued blog layout construction.  I think it is worth noting the primitive conditions in which I endure to blog.... for instance, my internet connection is through smoke signal and my computer is actually a typewritur.... oh lemons, where's the white out.....
_
_
All that aside, we are off to a busy and exciting start here.

The basement is under construction: stud walls are up, next will be installing all the electrical.  This area is going to be the new playroom and storage.


 A meeting is set for THIS WEEKEND to see, for the first time, and review the design plans from our landscape architect.  We are super stoked and somewhat scared.  We look forward to having a nice outdoor eating area but fear the price tag that's going to come with it.  She is actually re-laying out all areas around the house but we plan to complete it piece by piece over a span of time (we try to pay for everything with cash).
Here she is doing some land surveying, and yes I took this picture of her secretly through a window (which is completely ok, if you are the one taking the picture)-

Other projects in the works or soon in the works:
  • Completing the finishing details in the dining room (yawn, old news)
  • Putting on window trim in the kids and living room
  • Taking my Christmas decorations down (its on the list, but probably not blog worthy)
  • Transforming the back entrance closet to a more function space
  • Operation kid's rooms (more details later)
  • Fence building/spring homesteading planning (we had this area cleared behind our property, see what happens when you are nice to the power company, it also helps them out)

 On the family front, the youngest turned 1 recently.  Since I like comparisons, here is the line up of each kid on their 1st birthday stuffing cake in their face.

Little man-


Little lady-


Baby girl-


All the above photos were taken with a 35mm camera and film developed at the one hour photo at Walmart (play along that it still exists).  How they got on the blog is magical, that is all you need to know.
:)

Thursday, August 29, 2013

Top Secret House Update

Well it was top secret until last night.  Here's the story.....
If you remember we had our basement worked on recently to fix our excess moisture problem.  To prepare for the work, Jonathan had to rip out moldy shelving around the parameter of the basement all by himself.  (Since I am pregnant we decided it was best for me NOT to hang out with flying spores).  I felt kind of bad (emphasis on kind of) he had to do all the heavy lifting on his own so I wanted to help in some way.  The opportunity arose early this week when he was traveling for business.  I set out to conquer his work bench area, organizing and neatening it up for his birthday.
Here was the work bench area before I went to work-


Full disclosure, I am not afraid of much.... EXCEPT spiders and even their webs.  Though very useful beings... I just don't like them.  I would hold a snake any day before a creepy, leggy arachnid.  Bleh.  I bring that up to show my dedication.  There were spider webs everywhere.  Anyway, I made SOME progress and jump started the basement updating-


Home Depot sells a peg board organization kit for around $11.  These hangers are all from one kit-

I painted the lower board with magnetized paint.... for tacking up 'napkin drawing' plans and such.  That's how we make plans around here, on random scraps of paper.  I first saw magnetized paint in my friend's playroom (the Hallidays) and thought it was a great idea.  You can paint blackboard paint (for a chalkboard), dry erase board paint or just regular paint over top and it still works as a magnetized surface.  Just FYI, I think a large area would be an absolute BEAR to do with the sludge-like magnetic paint.... but its obviously do-able.

To birthday-it-up, the kids helped me make a sign.


Little man helped taste test the cake (red velvet if you're wondering why its as red as my canisters).


Somehow it all came together.  I am not on top of my game these days.  Momma is more tired than normal.  Happy birthday husband!


Thursday, August 8, 2013

Basement Drains Complete

Our basement job was completed within one day.  This was nice since most businesses we have contracted for jobs have been late to start and late to finish.  We are extremely pleased with the company and their workmanship so let me know if you would like their name.  So far only two businesses/contractors that have worked on our home have really pleased us: this basement company and the guys who installed our carpet.  Working with good people makes a BIG difference.
If you don't remember, we needed work done due to our basement flooding.  Post about the work is here- There's a Jackhammer in My Basement

Here was the old sump pump area (and lowest point in our basement) during the work-


Here is the completed job-


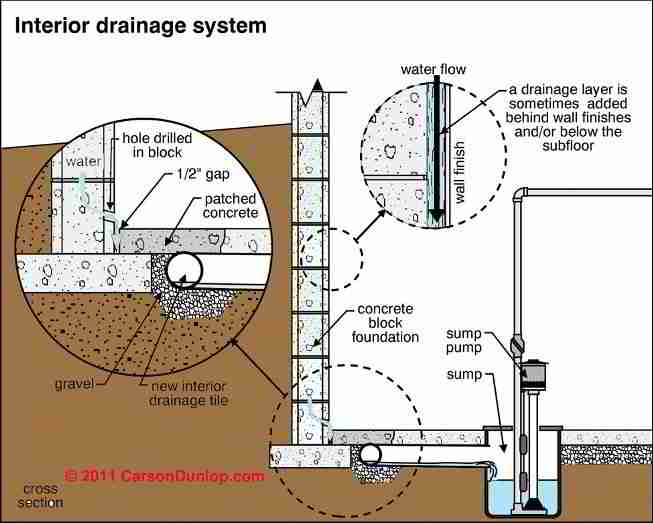
So the basic technology of the Grate Drain is the below rectangle chambers act as a submerged gutter.  These gutters or chambers are submerged around the entire perimeter of the basement, surrounded by gravel and covered by concrete.  The outside water flows down the exterior basement wall and through holes made in the wall parallel to these chambers.  The ground water flows into these chambers and is then pumped out instead of seeping through the floor and the wall/floor joint.


There are access ports all around the perimeter in case the system ever needs to be flushed.  We can also connect a hose from our dehumidifier to a port, so we don't have to continually dump the bucket (we were having to dump it every few days through out the summer).

Others pictures of the finished product.  Jonathan's 'shop' area-


Drain added at base of bulk head stairs.  Water sometimes gets through the bulk head and runs under the door into the basement.


We have heat and a separate thermostat in our basement which is nice.


This area we are considering to finish as a playroom.  This is very exciting and makes this expensive project even more worth it (since before it was NOT a possibility with all the flooding we kept having).

It also makes storing things down in the basement easier.  Before, items stored in the basement smelled musty and always had to be off the ground.

Like I said, it was expensive work but we do not have to worry with flooding anymore.  And since we have a generator even power outages are not too much of a threat.  Good peace of mind especially since it's hurricane season. :)

Wednesday, June 12, 2013

Side Yard Before and After

Pardon my blogging hiatus.... lots has been going on.  This post is a quick before and after of our side yard improvement, nothing jaw dropping here.

The cleanup started about a year ago to this date when my parents visited.  My Dad cannot sit still and has to always be busy with something.


 After the brush was cleared we were able to get the two trees cut down.


Then Jonathan tore up the area (since it was all weeds and crab grass), re-seeded it and such.


Last our neighbor put up a new split rail fence just a few weekends ago.  He has been wanting to do this project for some time.  Sweet!


Not the best before and after pics, but here it is again-

After-

So thats about 1/16 of our yard.  Now onto the rest.

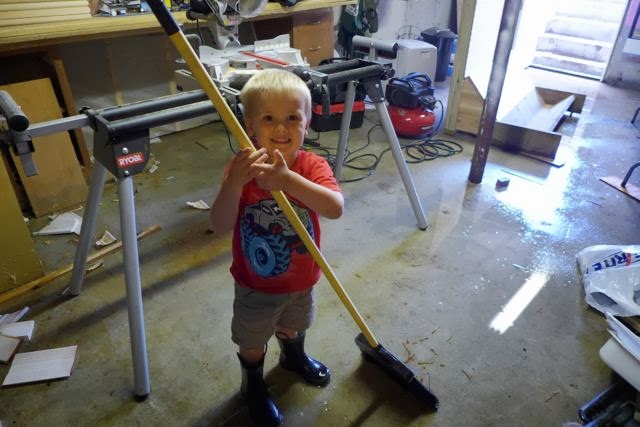
We are currently dealing with a flooded basement after all the rains, about 1" standing water throughout.  Basement guy was here today for an analysis of how to fix the problem.  Looks like we will be doing some home improvements in that area soon.