Showing posts with label preserving. Show all posts

Thursday, September 10, 2015

30 Minutes Or Less Food Preservation

For some reason typing this title made me imagine myself having my own cooking show, which instantly brought on this next image of what it would probably look like-


Sooooo, while my mind is in full disclosure mode let me add that I feel somewhat silly writing this post.  You see, though I encourage people 100% to try and grow and preserve their own food, this year I did very little of it.  We did grow a garden this year and reaped some rewarding food, but crab grass was our main speciality.  So if anyone has any good crab grass recipes please share it (or don't).

So here is my quick list of EASY THINGS TO GROW and then PRESERVE in LESS THAN or around 30 MINUTES.  

(Please note that I do not live in a vacuum by any means, I try to do this stuff when kids are taking quiet time, watching a show or in bed.  Otherwise add 4 hours to the processing time.)

------------------------------------------------------------------------

1.  Tomatoes


Tomatoes are pretty easy and can be grown in a container on a back porch if needed.  Remember that if in a pot that it will usually need more water.  As you know there are many varieties to choose from, we like to grow sweet, meaty varieties because you get more 'meat' and less water.  We have had good success with Amish Paste, San Marzano (both 'plum' varieties) and Brandywines.  There are SO MANY other meaty varieties though so ask around what grows well in you area or just buy them from a road side stand.

Preserving
I am NOT a huge fan of eating fresh tomatoes, I AM a fan of having them around in the winter for soups or stews.  Making sauce and pressure canning them takes more time than 30 minutes BUT they freeze beautifully.  Just wash and dry them, make sure no rotten spots, pull off stem and put them in a freezer bag.  That is all.  No blanching, skinning required.  I'M SERIOUS.  Here's the cool thing, when you want to use 1 or 10, pull them from the freezer and let thaw only a little.  I actually just run them under warm water to thaw a little.  Once slightly thawed the skin will slip easily off.  So easy.  I will cut the whitish, firm stem area out and then maybe quarter before I add to a soup or stew recipe.  They will break down and mash up just like canned tomatoes.  If they are still slightly frozen they are easy to cut and won't squish.  So why buy canned, stewed tomatoes again?  I make our own tomato soup with frozen whole tomatoes, better than Campbells and VERY quick.  Recipe Here.  Also note that once fully thawed they are very squishy so don't expect them to be very good on a sandwich.


2.  Pickles


Cucumbers are easy to grow and can be grown in small spaces up trellises (they love to climb and look lovely too).  For pickles you need to grow a pickling cucumber variety, but let me say that I think pickling cucumbers taste better than regular cucumbers freshly sliced.... but that is just me.  They are popular with my neighbors for sure.  They are also very abundant so you get a lot.  Cucumbers are one of my favorite vegetables for many reasons.

Preserving
Pickling can be quick depending on the recipe.  In short, most dill or sour pickles (which is what we usually do) involves making a brine, cooling it and adding brine/spices/cucs to the jar.  Done.  Give it time to actually pickle in the jar but you don't do anything in that regard.  We keep these in the frig since I do not seal them through a canning process.  Plus, cold pickles are tastier in our opinion.  Another pickle post Here.

3. Fresh Herbs
http://moorefarmsbg.org/wp-content/uploads/2015/05/herbs.jpg
Some herbs are so easy to grow they are a nuisance, meaning they will take over the area they are in. Talk about a huge difference fresh herbs make in recipes, HUGE.  Comparing dried herbs to fresh herbs in taste is like comparing sleeping on wet concrete to sleeping on an amazing mattress.  Maybe a slight exaggeration.... slight.

Preserving
I put the fresh herb leaves whole in my food processor.  I turn the processor on and start adding oil slowly.  Just enough to chop them and stick to the sides of the processor.  A little more oil is ok too.  I then put the 'paste' in an ice cube tray and cover with plastic wrap (I fill basil to the top of each cube, stronger herbs tasting herbs maybe only half cube).  Let freeze solid them put the cubes in a freezer bag.  Label the bag because they all look like green squares.  I use them in soups and even pasta dishes.  I just throw the frozen cube right into the hot soup at the end or hot pasta.  I make and freeze basil pesto this way too and love having summery pesto dishes in the middle of winter.
Note: I have not experimented with freezing all fresh herbs, I assume most leafy herbs do well but if you know otherwise please share the knowledge.

4.  Edamame (Or Soybeans)
http://www.withamymac.com/news/wp-content/uploads/2010/10/edamame.jpg
We grew Edamame a few years ago and loved how easy it was and how great it turned out.  We had eaten edamame at some Japanese or other Asian inspired restaurants and alway like it.  The kids like it ALOT too.  We think they like the saltiness of them (we add sea salt).  And it's good for you!
This is the kind we grew linked HERE, we love Botanical Interests seeds.


Preserving
Just blanche, ice bath and freeze in a freezer bag.  I freeze them on a cookie sheet so they don't stick together then put them in a bag once frozen.  That way you can take out a little at a time as you want a snack.  Just defrost or warm them up, don't cook them again.  Did I mention these were really good, just add sea salt.


5.  Potatoes

This is a picture of my parents potatoes and onions, happily stored in their garage.  Potatoes are pretty easy to grow.  You just need well worked up soil and seed potatoes.  They don't take up anymore space than a bush bean plant.  Some people have grown them in straw towers (aka potato towers) or bags of soil (aka dirt bags, aka the media and their.... I will stop there).

Preserving
You just put them in a paper bag in a cool, dry place.  We put ours in our basement.  You don't even have to clean the dirt off.  Done.  Just wash off before you cook.
Sweet potatoes and a dirty boy from a few years ago.  Sweet potatoes are vines and take up more space but easy to grow.

Other things that are a quick blanche and freeze worthy:  green beans, asparagus and corn.  Also easy to freeze and come out great:  BERRIES!!  We love having our picked blueberries in yogurt most of the year.  Berry cobbler in the middle of the winter anyone. :)

Please share if you have any food preserving tips!!!


Wednesday, August 13, 2014

Canning is NOT hard

Let me start out by sharing a concern of mine.  I have mentioned to some of my mom friends that I worry Jonathan is going to come home one day and find me like this-

Sitting in the kitchen with a bonnet on churning butter so something.
The joke here is I am spending most of my time doing lots of domestic stuff.  Not necessarily a bad thing, it messes with my mind at times though.
---------------------------------------------------------------------------------------------------------
Back to canning-
Tomato plants are pumping out some major fruit these days.  It's a bitter sweet thing....
Sweet because, YAY!, we have lots of 'free' and tasty produce.  Bitter because, yay, now I have to find something to do with it before it goes bad.

This lovely basket was hand made by Dad Trexler

Thankfully, canning and preserving fresh tomatoes IS NOT THAT HARD.

On a side note, raw whole tomatoes freeze great for later use in soups, stews and sauce.  You don't even have to peel them.  Once they thaw the skin slips right off.

Back to canning-

If you are canning fresh tomatoes alone, you DO NOT need a pressure canner.  Only a pot big enough to hold enough water to cover your jars.  Last year I used a lobster pot (it was one of my New England welcome presents when I moved here).  This year I actually have a pressure canner thanks to a birthday present.  I recommend looking at the below websites for expert tips.  This post is just to show you how easy it is if you are thinking about trying it.
Also those that already can, feel free to share your tips!

USDA tomato canning guidelines - http://nchfp.uga.edu/publications/publications_usda.html
Pick Your Own website - http://pickyourown.org/canning_tomatoes.htm

First set up your 'processing line', which should include:

  • A boiling pot of water to blanche the tomatoes (big is good)
  • A bowl of ice water to quickly cool the tomatoes
  • A large pot for heating and crushing the tomatoes (if crushing)
  • A large boiling pot for the water bath with enough water to cover the tops of your jars by an inch
  • Cutting board
  • Hot jar handling tools (I got a simple canning kit that included jar tongs and a hot lid picker upper, that has to be its name) but maybe you could improvise here if you don't have the tools.
  • Ladle, strainer spoon, jar funnel and potato masher
  • Lemon juice

Also get your jars HOT and clean.  I do this just by putting them in the dishwasher through a washing cycle.  They come out, like I said, hot and clean.


You will also need new canning lids for the jars.  They are easy to find at the grocery stores or Walmart.  I re-use my rings and jars each year but they recommend you use new lids for sealing reasons.

1.  Blanche your tomatoes just until the skin cracks.

2.  Cool the tomatoes, slide the skins off and cut out the hard tops.


See so far not so bad-

The next steps are for canning crushed tomatoes.  See the previously listed websites if wanting to can whole or cut up tomatoes.

3.  Put some of the peeled whole tomatoes in an empty pot.  Heat pot quickly and crush when hot.  You want to crush when hot because the tomatoes (the pectin) start breaking down once they are cut or crushed.  Heat deters the breaking down process.  This breaking down causes separation (solids from the liquids) once in the jars.  This doesn't affect anything, just give them a shake before use.
4.  Cook crushed tomatoes for about 5 minutes.
5.  Add proper amount of lemon juice into hot jars (see websites for amounts and reason why).  I add 2 Tbsp for my quart jars.
6.  Ladle into hot jars.  Make a strange face (optional).

7.  Place a warm lid (I warm them in hot, but not boiling, water) and tighten the ring onto the jar.  Make sure lid seal and jar lip are CLEAN so to get a good seal.
8.  Place in the boiling water bath.

9.  Process/boil per recommended time.  For quart jars its 45 minutes.

DONE!

See I had quite a bit of separation (for a known reason but not interesting enough to share).  Like I said though, this doesn't affect taste or anything when using for cooking.  It all gets remixed back together.

I used about 45 Amish Paste tomatoes (similar to Romas or Plums) and 5 large Brandywine tomatoes to  get these 4 quarts.

I use our canned tomatoes for making sauce, soups and stews.  Last year we discovered how amazing (and ridiculously quick and easy) making homemade tomato soup is.  My favorite recipe here- http://www.marthastewart.com/343299/creamy-tomato-soup
Just a note, Campbell's tomato soup second ingredient is High Fructose Corn Syrup.  Not that I am against eating HFCS but prefer to limit it as much as I can.

OK, hope this was helpful.


Wednesday, February 12, 2014

Curing Hams

We are attempting to cure our own hams this winter.
Mainly for two reasons:

  1. The place we send our pigs to de-bones the hams and smokes them, the hams are usually small and somewhat dry (granted they are not injected with solution like the store hams).
  2. After Jonathan ate my parent's home cured country hams he fell in love.  You can't get anything like that around here that I know of.  Maybe something similar at a specialty store possibly but would be expensive.
So with my parent's counsel we are trying to cure our own.  I hope I wrote down the correct notes over the phone from my Dad.  At the time I was over due pregnant and more brain challenged than usual.

Here is what we did-
We started with one of our FRESH hams.  Not one that talks back, but one that has not been smoked or cured.  The ones at the store are usually smoked or cured to cut down on cooking time.  Our meat processing house gave us one full fresh ham back cut into the two standard pieces: the shank and the butt-

The Butt End is what it implies, the butt or buttocks of the pig.  The Shank is the part below the butt, so more like the pigs back thigh area.
Here is our Butt and Shank (the shank ham already has the rub on it).  They are about 8-10 lbs each.


Here is the recipe my Dad gave me.  I had to search around for Salt Petre (potassium nitrate) but was finally able to get it through the CVS pharmacy for around $5.  Its available online also.

2 cups brown sugar, 1 cup table salt, 3 teaspoon black pepper, 1 teaspoon salt petre-

Rub it on to about 1/8" thickness.  It also exfoliates your hands.

Then we wrapped them in butchers paper.  I was told not to use any waxy type paper so the meat can breath and drip out juices.  Now they just need to cure for around 30-40 days in temperatures between 32-40 degrees Fahrenheit.  The old timers would hang the hams in their smoke house.  We plan to do the same in our shed but temperatures have been really cold here this month.  Right now the hams are curing in our frig.  
If the temperature is below freezing then its not a big deal, the hams just won't cure due to being too cold.  Therefore you would have to allow for more curing days.  If temperature gets above 40 degrees though then the meat could spoil.

Crossing my salty fingers it works!  We will let you know.


Tuesday, August 13, 2013

Making Homemade Pickles, Is It Worth It?

Sound the match bell.  Homemade pickles vs. store bought pickles are going to battle.... sort of.
Though this is an unfair matchup in regards to flavor I still wanted to give it a looksie.

VS
So like the other homemade vs. store bought battles, the criteria only looks at cost.  Does it save money?  Is it a good way to preserve some homegrown vegetables throughout the winter?
One disadvantage might be that my particular recipe uses more ingredients than some other homemade pickling recipes.  We personally love this one though so this is the one I use.  Recipe was given to me by Mr. Wood in upstate, NY.


Here is the breakdown of cost to make Mr. Wood's Garlicky Dill Pickle recipe (yes, I troubled myself with this math for curiosity sake):
Homegrown Pickling Cucumbers (estimate per cost of cuc from packet of seeds that cost $1.59)- $0.003 
Cider Vinegar- $0.177
Sugar- $0.23
Sea Salt- $0.23
Pickling Spice- $0.03
Fresh Dill- $0.56 (or easily grow your own) 
Garlic- $0.25 (or easily grow your own)
Seeded Rye Bread (yes this gets put in there)- $0.08

TOTAL- $1.56 / homemade quart of Garlicky Dills
compared to
TOTAL- $2.00 / pint (or $4.00 / quartof standard store bought dill pickles

So $2.44 savings per jar of pickles!

From a quick search, here are the ingredients in one of the most common store brand dill pickles-
  • Cucumbers, Water, Distilled Vinegar, Salt, Calcium Chloride, Sodium Benzoate, Polysorbate 80, Natural Flavors, and Yellow #5.
Time should also be a consideration.  NOT counting cooling time of the brine, it takes me less than 30 minutes to make multiple batch of pickles.  They are easy, it basically just stuffing the jar with ingredients and pouring the brine over top.  Granted I don't technically can/seal the pickles, but with all the natural preservatives (such as salt and vinegar) I don't worry with refrigerating them constantly or worry about bacterial getting in my gasket lid mason jars.

So are homemade pickles worth it?  You can decide for yourself.  As for us, YES.   Pickles make for an easy snack we ALL enjoy and quick finger food for entertaining guests.

Beside, in our house cucumbers are more safe inside jars.... otherwise baby girl will find them and bite their heads off-


So consider me doing you a favor cucumbers-


A lovely story about pickles here- Tale of the Traveling Pickles


Wednesday, June 19, 2013

Straight From Farm to Mouth (Skip the Table)

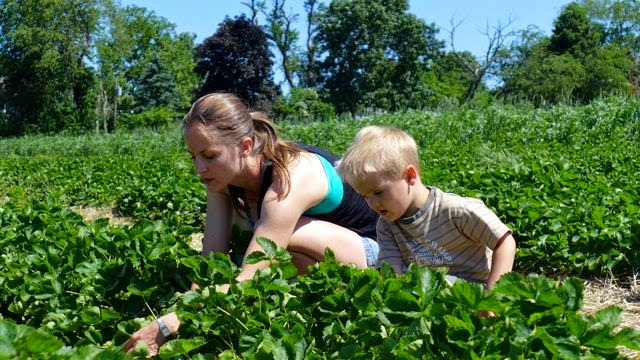
It's finally strawberry season here in New England and, boy oh boy, the fruit is lovely this year.  I forced my husband, I mean, I requested we take a break from our crazy Saturday work schedule to go and pick strawberries as a family.  Little man had been asking to go pick berries and we don't get to do alot of fun activities with daddy (hard working guy these days) so we had to work it in.

To the berry patch-


First, baby girl had a quick lesson on how to NOT destroy the plants while trying to pick berries.


Then off she went-


After realizing the 'fruits of the labor', she didn't stop-


This might sound silly but we recently read, Blueberries For Sal, by Roberty McCloskey.  From that story little man understood the concept of picking and saving food for the winter.  He did a good job picking and saving instead of eating them all.  He does like having a job, makes him feel 'big'.-


I like having jobs like this myself  :)


In the meantime, still chowing down-


Look at that tummy-

We managed to get enough picked-


And turned it into good things for the future-
(Every time I pick berries and make jam I think of home.  When I used to pick up strawberries at Scott's roadside stand on the bypass during my lunch break for me and my co-workers at Numark.  It meant summer was really here.)


Though little man did pretty good holding out on eating the berries while picking, strangely enough he doesn't have the same will power towards the sugar snap peas in the garden.  Only a few have actually made it out of the garden to the dinner table.  Baby girl loves them too.


More garden news later.  And still no piggies... probably mid to late July now.  And house news.... we scheduled the basement guys to come fix our leaky basement by installing french drains and get a new sump pump.  Pricey unfortunately but important in caring for our foundation.  On the downside.... probably no central AC installation that I was hoping for this year. :(