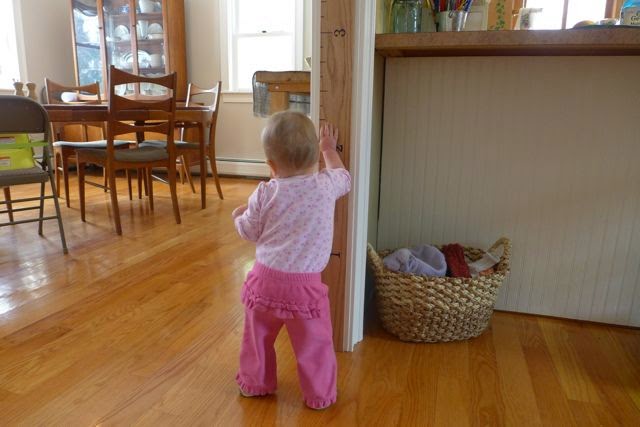
I am one step closer to having the dining room complete. Big deal my friends, BIG. DEAL.
The latest completion- walkthrough painted and I made a growth chart ruler!
I set myself to completing something since I needed a bit of a mood lift. This was Monday-
We got about another 10". Don't get me wrong, I like snow. I like to play in the snow. It just limits outdoor activities somewhat, we try to be creative though.
So completing something on my to do list always lifts my spirits. The kids like the ruler too-
Notice in the, background baby girl unloading the colored pencils, the illusion of my clean home is ruined (not that I mind, otherwise I would not have pointed it out)-
Kids love marking and seeing their growth. Also, another good thing about the ruler is we can take it with us if we ever move.
Here was the before; old woodwork is stained pine.
We learned that you have to paint a 'seal' over the knots otherwise this will happen (this is our living room cabinets)-
The Kilz we had on hand didn't do the job, we used B-I-N Shallac Base Primer and it seems to have worked.
You see here, the stain that wasn't fully sanded away is seeping through our primer coat (before we used B-I-N)-
Ugh, so much prep just to get something painted correctly. Remember how much I hate painting, my last whine about it HERE.
Also note, that I slightly cringe at painting wood white. I like the clean look of white but DO prefer the natural look of wood more, just not pine. We are trying to keep as much natural wood as makes sense.
The natural wood ruler does add some nice texture here-.
Also, it was easy to make.
- Bought thin boards (I think red oak) for a low profile and easy to tack flush to the wall
- Applied a few layers of Satin Finish
- Marked lines with a black sharpie
- Pause for a motorcycle race
- Used Century font as a template to trace the number (or could stencil them), again used a sharpie
To end, here is a detail in the Dining Room I could use input. We had to rip out all our old trim, if you remember. Jonathan replaced it and now we are left with a gap and exposed raw edge at the top-
Cutting a piece of trim at an angle (to form a wedge to finish the end) will not work because of the angle of the trim. The wedge piece would angle downward instead of perpendicular into the wall. Too big for a filler like caulk.....
Any ideas please!!!!
Basement electrical and lights should be installed (by hubby and a friend) next weekend so we can get back to work on the new playroom. I am SUPER pumped about that. We also budgeted out our other updates for the year. I am very excited to share them with you as we get to them. :)


